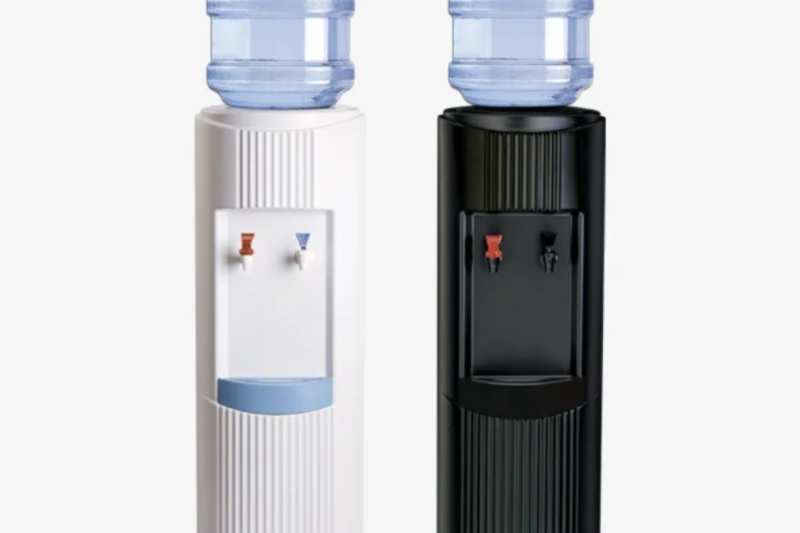

If you’ve invested in a water cooler for your business, or you’ve added a countertop water cooler to your home, then we’re sure you’ve realised how worthwhile they are for the benefits by now.
However, many customers often feel uncertain about the best ways to care for their bottled water coolers. Like anything else, coolers need to be cleaned and maintained in order to stay fresh, but what exactly do we mean by this?
Today, Drop Water Coolers will run through the best ways to clean your water cooler for beginners. In fact, it’s recommended that you give your water cooler a quick scrub and once-over every 3-6 months!
Join hundreds of happy customers today by investing in a bottled or mains-fed water cooler for your business. You can save on water bills while minimising plastic waste; it’s an eco-friendly switch that benefits everyone!
Why you should clean your water cooler regularly
It goes without saying that anything lasts longer when you take good care of it.
So, trust us when we say that cleaning your water cooler regularly is key to making sure you continue receiving fresh, clean water for years to come. If you need some more convincing, here are the benefits:
- Keeps your water tasting fresh: The whole reason you’re buying a water cooler is to enjoy fresh, clean water, right? Therefore, cleaning your cooler regularly helps prevent the buildup of limescale and bacteria for a better taste.
- Avoid germs, mould, and biofilm: Cleaning your water cooler helps to prevent biofilm, a thin layer of bacteria that clings to the inside of water tanks and pipes. Creating a regular routine will protect users from bacteria like E. coli or Legionella.
- Stay compliant with health & safety guidelines: As an employer, it’s your responsibility to provide a safe and healthy environment for your employees. By following proper water cooler hygiene protocols, you will prevent users from getting sick.
- Make your cooler last longer: To keep enjoying your cooler for years to come, clean it regularly to prevent wear and tear. Doing so will keep your filters running smoothly and help avoid breakdowns caused by gunk or scale.
So, are you ready to make the most out of your investment? If so, keep reading for an easy-to-follow guide on cleaning bottled water coolers.
(Don’t worry; it’s not as hard as you think.)
What you’ll need
Before you roll up your sleeves and start cleaning, it’s best to make sure you have everything you need first.
Luckily, you don’t need any specialist tools! Just some basic cleaning supplies and a good eye.
- Cleaning solution (mild bleach or white vinegar)
- Mild dish soap
- Soft sponge or cloth
- Bottle brush or long-handled scrubber
- Food-safe descaler (for hot water boilers)
- A bucket or jug
- Rubber gloves
A step-by-step guide to cleaning your water cooler
So, are you ready to give your water cooler a good scrub? Don’t worry; it won’t take you too long! In fact, it should only take around 30 minutes altogether.
And you’ll be able to enjoy fresh, clean water once it’s done.
1. Turn off and unplug the cooler
Before you begin, turn off the electricity for your bottled water cooler and unplug it from the mains.
If your model comes with a boiling water tap, allow the cooler to cool down for 15-20 minutes before proceeding. Then, remove the water bottle and set it aside somewhere clean.
2. Drain the reservoir
Once you’ve removed the water bottle from the unit, open both the cold and hot taps and drain the water into a bucket.
Some water coolers come with a drain plug; these are usually located at the bottom or back. When you’ve located the drain, open it to allow any residual water to flow out, using a tray or bowl to catch the water.
3. Clean removable parts
Then, remove the drip tray, top collar or baffle, and the tapz/nozzles to give them a good clean, as they are susceptible to bacteria, mould, and mineral build-up.
Fill up your sink with hot water and add in some washing-up liquid. Once it’s ready, you can add in all of the removable parts and leave them to soak for 5-10 minutes.
Then, use a small brush (like a fresh toothbrush) or cloth to scrub each component, making sure you’re getting into the small crevices. Once everything looks clean, rinse all parts under fresh running water to remove any residue.
Leave them to dry on a towel before reattaching. If you can’t remove the taps, use a cloth soaked in sanitiser or vinegar solution to carefully clean around and inside the spout and run it through the tap. Let it sit before rinsing it out (do this around 3 to 4 times).
4. Sanitise the interior reservoir
The interior reservoir is what holds the water before it’s dispensed, so this needs a good scrub.
To do this you can either:
- Mix 1 part white vinegar to 3 parts warm water to break down mineral deposits and neutralise mild odours.
Or
2. Add 1 tablespoon of unscented household bleach to 4.5 litres (1 gallon) of water to get rid of bacteria build-up.
Once you’ve decided, pour your chosen cleaning solution into the reservoir until it’s about half to three-quarters full ( don’t overfill!) Then, gently swirl the cooler to allow the liquid to coat the entire inside of the tank.
Leave it to sit for around 2-3 minutes before using a non-abrasive sponge or brush to clean the inside walls. Focus on the bottom of the tank and around the tap openings to remove any limescale.
5. Rinse, Rinse, Rinse!
It may be tempting to rush this part, but thoroughly rinsing your water cooler is key to making sure you’ve done a good job of cleaning it.
If any traces of vinegar or mild bleach are left inside the interior reservoir, you can expect:
- An irritated stomach
- Foul tasting water
- Damaged internal components
So, after scrubbing, pour in fresh water until the reservoir is about three-quarters full and let it sit for 1-2 minutes to flush out the cleaning solution. Then, open both the cold and hot taps and let the water run through completely into a clean bucket.
Repeat this process 3 to 4 times, until the water no longer smells like bleach or vinegar.
6. Clean the exterior
Now, it’s time to clean the outside part for that fresh, clean appearance.
Get rid of those pesky fingerprints, pieces of dust, and dirt marks by scrubbing the tap handles, bottle collar, buttons, and control panel (if applicable) with a damp cloth and soapy water.
Disinfect areas that are touched the most, such as the taps and the side of the cooler, with a sanitiser that’s safe for use around food and drink.
For those hard-to-clean areas, such as the nooks and crannies around buttons, nozzles and drip tray slots, use a cotton bud or toothbrush when cleaning.
Once all of that is done, simply reassemble all the removable parts, refit the water bottle, and connect back to the mains supply!
Invest in convenient drinking solutions today
If you’re looking for a modern, compact, and highly durable water cooler for your office, salon, construction site, etc., then we have just the thing for you at Drop Water Coolers!
We have a range of stylish and hygienic bottled water coolers to money-saving mains-fed coolers for every customer.
Psst. We even offer a 14-day free trial, so you can try before you buy!
FAQs
Can I use bleach?
Yes! You can use bleach to clean water coolers from Drop Water Coolers, but we suggest using a mild, unscented solution.
You can dilute it yourself with 1 tablespoon per 4.5 litres of water to make sure it doesn’t damage the surface.
Why does scale build up?
Every time your cooler heats water or stores it in the tank, naturally occurring minerals, such as calcium and magnesium, separate and cling to the inside of the reservoirs.
This can leave deposits behind, causing scale to build up.
How often should I clean my water cooler?
If you own a water cooler in a large office, we suggest giving it a quick wipe down and emptying the tray every 1–2 weeks.
High-traffic areas collect bacteria more quickly, so keeping on top of this will make sure the dispenser taps and water tray stay clean for fresh-tasting water.
How do I know if my cooler needs descaling?
Common signs that your water cooler needs descaling include:
- White flakes in the water
- A chalky taste
- Slow heating performance
- Limescale deposits on taps or inside the tank
Can I DIY mains-fed upkeep?
When it comes to mains-fed water coolers, there are a few steps you can take to keep them clean. This includes:
- Wiping down the exterior with a soft cloth and food-safe sanitiser
- Cleaning the drip tray and taps weekly
- Sanitising the reservoir and internal tank (if your unit has a manual drain or access panel)
- Replacing filter cartridges (as long as you turn off the water first)
However, mains-fed water coolers are designed to keep your water clean with integrated filters and cleaning systems.
When it comes to internal pipework, replacing pressure-regulating parts or valves, and fixing leaks, leave these to the professionals.
Can water coolers get mouldy?
Yes. Like anything that’s exposed to frequent damp conditions, water coolers can become infected with mould, mildew, and bacteria.
Anything from constant splashes, dirty drip trays, and warm office environments can cause mould to grow.